Greeting Card Tutorial: Embroidery!

A thank you to all that have stopped by & looked, liked, commented, or a combination of all three. Deciding to start a blog wasn’t easy for me due to introversion, but that was a feeling I pushed aside to forge ahead.

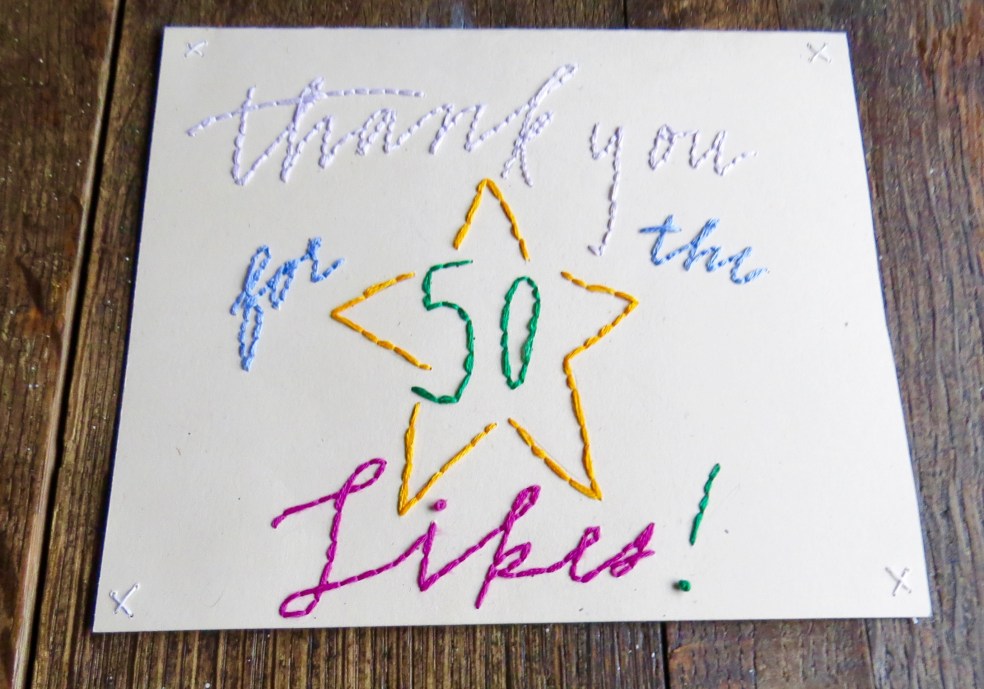
The way I typically thank those in my life is through a greeting card. With the internet being my platform here, I thought it best to provide a greeting card tutorial. The embroidery greeting card first came in to my life in the form of tiny hearts I cut out. I embroidered my friends’ initials or names in the hearts. Many of the tiny hearts were cut  without a thought about templates and I hadn’t learned back-stitch yet (my favorite right now)! This is the sophisticated version, using calligraphy style script, of those sweet little hearts. The embroidery greeting cards don’t take much time, but make a big impact on the recipients!

Materials:

  • Card-stock or any type of paper you would like to use for a card. Firm is better here.
  • Embroidery Needle
  • Embroidery Thread
  • General Purpose Thread
  • Pencil & Eraser
  • Scissors

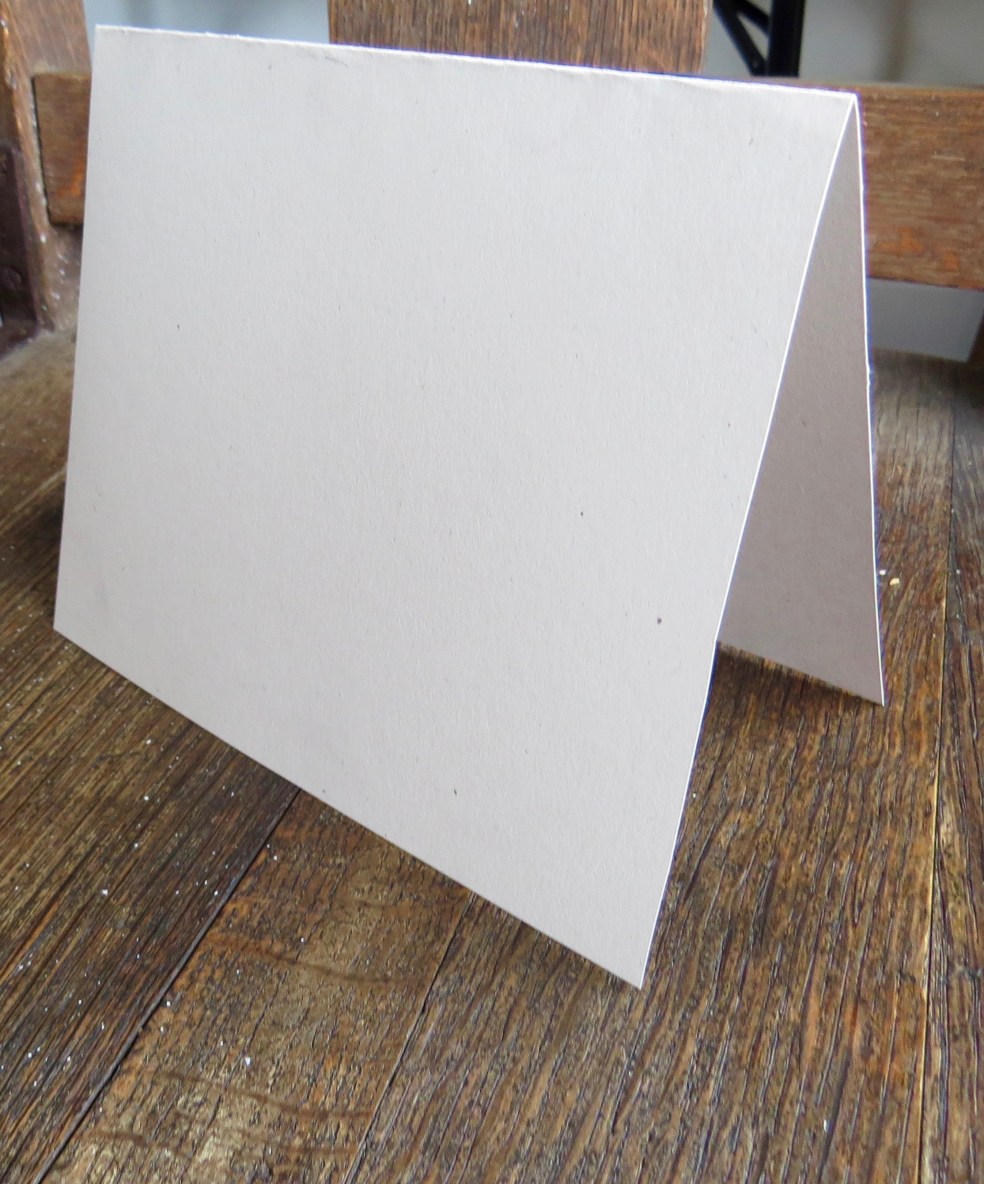
1.  Measure the paper to to size of card you would like. Here I cut the paper down to 6 1/2″ x 11″.

IMG_5177.jpg

2.  Fold the paper in half hamburger style. I used my fingers to set the crease.

IMG_5183.jpg

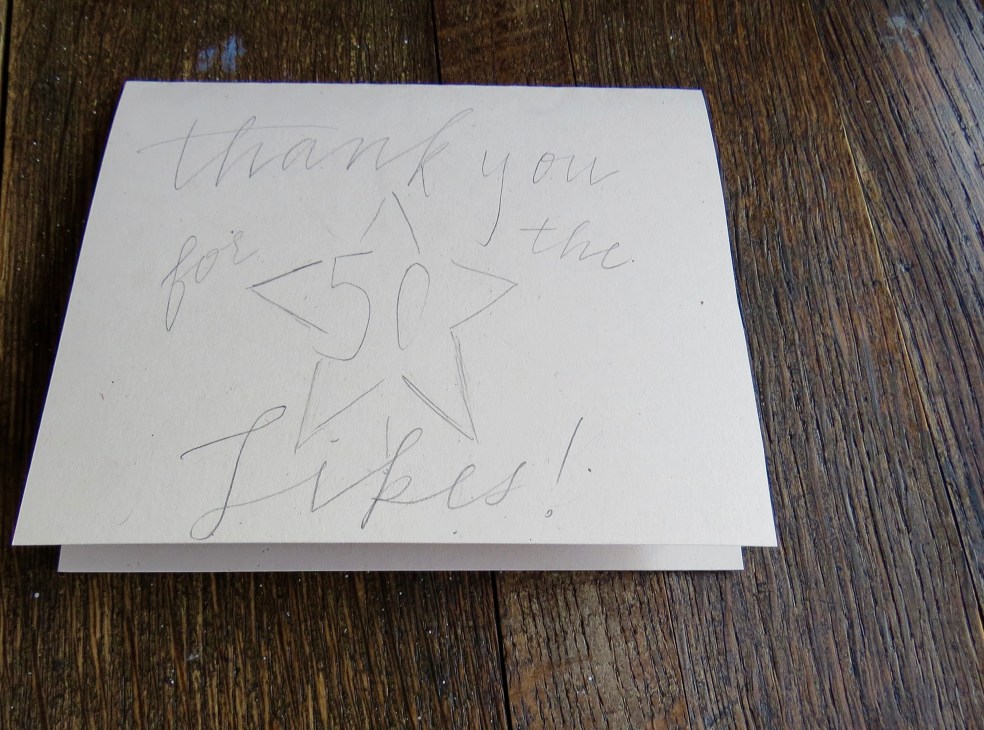
3.  Free hand draw what you might like on the card. Typically I write “Happy Birthday, _____!”, or if for a couple I draw both their names with a heart in-between. Don’t worry about using fancy script, because everything looks beautiful once embroidered.

IMG_5188.jpg

4.  Poke holes in the card every couple of millimeters or centimeters. The closer the holes are the more likely of a collapse of the card-stock between the spaces. The further apart the holes the larger the stitches will be and this will make the card faster to complete. A variety of stitch lengths are used in the making of this tutorial for demonstration.

IMG_5190.jpg

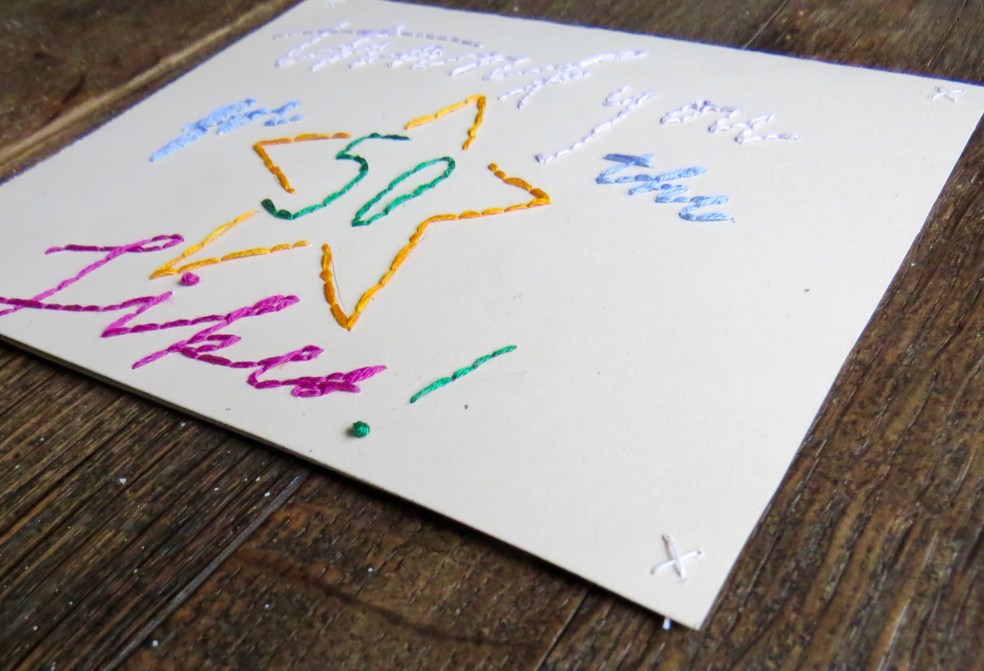
5. Pick your colors and embroider! I like to use french knots for periods. The thread may feel bulky and stiff, but this is because paper is a more firm fiber than cloth overall!

IMG_5192.jpg

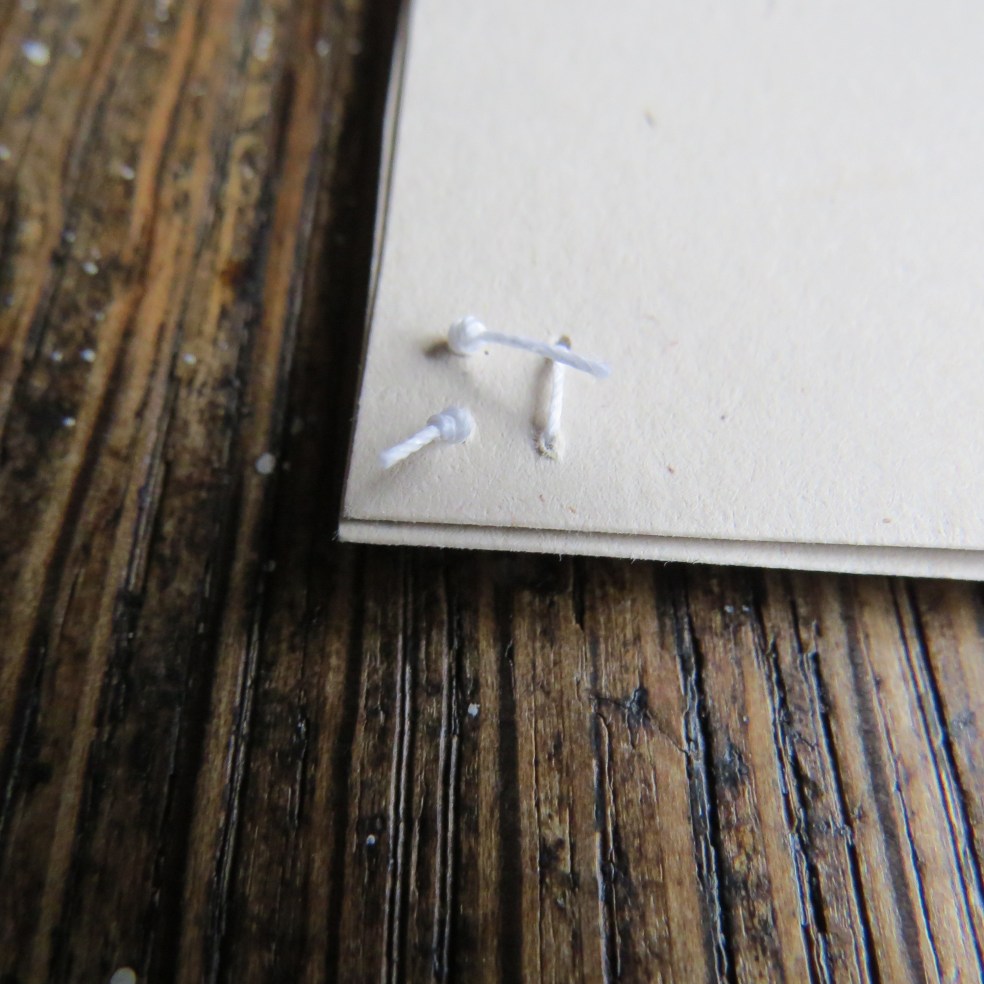
6. I prefer to hide the knots inside the card, but if you are feeling bold you may leave them on the outside of the card.

IMG_5193.jpg

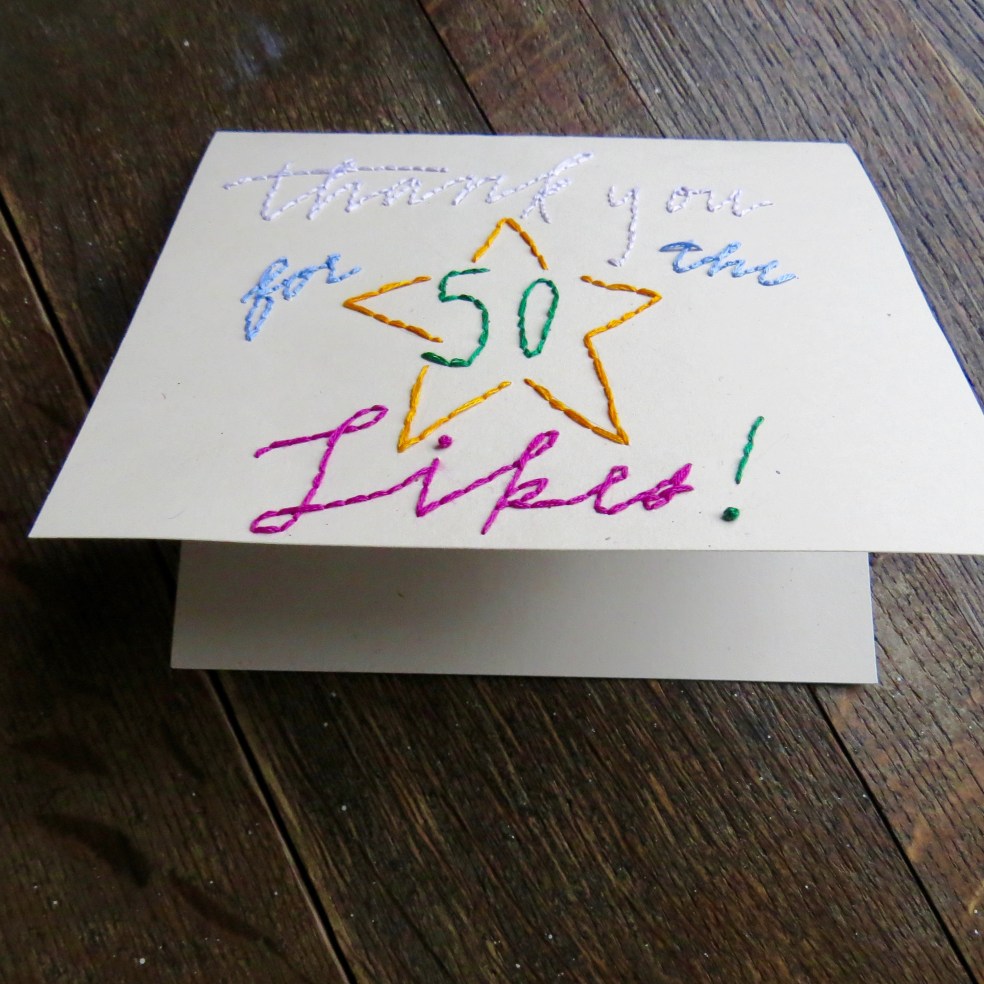
7. The corners have to be secured since the card will not close flat on its own. I used general purpose thread to anchor each corner with an X, but you could as easily use embroidery thread. I tied the knots to the back of the card.

IMG_5195.jpgIMG_5202.jpg

8. Admire & fill out your card to send away. Or you might use the card as a wall hanging for your inspiration board.

IMG_5204.jpgIMG_5197.jpg

Thank you for reading & I hope everyone has a lovely week. Please feel free to share any made embroidery cards!

Applique Away

After a week of figuring out some technology–hello, YouTube!–the computer is free for roaming. The snow has been beautiful. Everything is quiet and the cars move slowly along. The sunrise colors are delicate here. IMG_5120.jpg

Post Card Party Swap is a fantastic way to share small quilted pieces with other knitters and totally hits all my favorite categories: mail, pen-pals, quilting, and applique. The LQS offers classes with postcard ideas and this was a class I joined that used wool. It was my first time doing wool applique, and I love how textured and sturdy wool is to work with. When the snow began to fall, I decided to hand quilt circles as the background, enjoying it so much I worked on it until I finished.  Hand-stitching is calming, centering, and adds a beautiful finish to this little postcard!

IMG_5135.jpgIMG_5130.jpg

Practice makes for more experience and so out came the scrap bag and the rotary cutter, and I cut out six more hearts to applique. The squares are sevens inches by seven inches and the heart is a basic template. Since I’ll always have scraps about this size I plan on collecting at least one heart from each piece of fabric from here on out. When there are enough of appliqued I will make a quilt. Right now eleven appliqued hearts exist. IMG_5161.jpgIMG_5170.jpgIMG_5173.jpg

Savor Each Stitch arrived and it is a wonderfully written book with clear explanations. The first project is cut and ready to be basted. Basting, I’ve just learned after pinning ten hearts, is much easier to work with when doing needle-turn applique. What I particularly liked about basting is how smoothly the round edges turned under. It was a revelation to me, because the pinning seemed to cause distortion overall, but the basting kept all in place! Looking forward to moving ahead with this project. IMG_5154.jpg

Everyone is posting such lovely work! Thanks for stopping by and checking out the blog.


Tutorial: Loose Cord Holder

With all the indoors time this week I noticed cords all over the place. The cords took up more than a fair share of the floor space. Cord wraps & holders are nothing new, but I had an idea modification yesterday, sketched it out & whipped up four this morning. IMG_5103.jpg

These cord holders are perfect for cell phone and tablet chargers. For bigger corded items  these holders work great too! My main goal here was to utilize as much scrap material as I could to make something not-yet-useful productive. The buttons are from a collection of odd buttons & I used all fabric scraps. Customization is easy here! To make a longer & wider wrap for a certain product, measure the diameter of the cord when wrapped & double that number. This will give you an almost perfect measure of how long to cut your fabric; make sure to add at least a quarter inch at each end for seam allowance.

IMG_5114.jpg

Materials

  • Fabric scraps –enough for 2) 2″ x5″ pieces
  • Sewing Machine or Hand Sewing Supplies
  • Buttons
  • Fabric Marker or pen or chalk
  • Iron
  • Ruler
  • Rotary cutter or scissors


  1. Press fabric. Measure fabric & cut 2) 2″ x”5″ pieces.
  2. Place Right Sides together & pin fabric. IMG_5023.jpg
  3. Using 1/4″ clip each corner.IMG_5027IMG_5030.jpg
  4. Sew with a 1/4″ seam (or 1/4″ foot) the top & two side edges back-stitching at each end. Press to set stitches.IMG_5031.jpg
  5. Turn inside out, gently, with finger & knitting needle or chopstick. Press. Admire! IMG_5062.jpgIMG_5063.jpg
  6. Tuck in top edge & top stitch about an 1/8″ from the edge. IMG_5064.jpg
  7. Mark the button hole along the top edge & sew. If making two button holes, mark the top buttonhole first & then measure to add a second. This helps make sure fabric shrinkage doesn’t affect buttonhole placement. This may not be something you experience on your machine, but I like to be careful! When marking button holes, I went between 1/2″-3/4″ for the top button hole & around & 1″ to 1 1/4″ for the second button hole. IMG_5073.jpgIMG_5078.jpgIMG_5068.jpgIMG_5079.jpg
  8. Mark button position on fabric. Again, place the top button first. When placing the second button make sure the cuff is buttoned & then find the middle, marking it with a fabric pen. Sew on all buttons.IMG_5085.jpgIMG_5082.jpgIMG_5083.jpgIMG_5086.jpg
  9. Sit back & enjoy a less unraveled environment! Please share any pictures of wraps you make & let me know if you have any questions or comments. IMG_5091.jpg

Thank you to everyone that has stopped by, commented & liked this blog. Sewing, in all forms, has been a passion I’ve had for a long time & it is wonderful to share it with any one else that is even a little bit interested. Hope everyone is having a great weekend!  IMG_5107.jpgIMG_5112.jpg